Stop the madness of having outdated SCOM Agents in your environment
I have seen many SCOM environments where it takes multiple teams to update a single SCOM Agent to the latest Update Rollup. Often it takes months or even years to update all Agents to the latest Update Rollup. I created two management packs to make it easy to keep all your agents up to date. With these Management Packs your Application Admins, Server Admins or SCOM Admins can update their servers when they feel comfortable or have an open change window without requiring admin permissions.
Management Pack 1: Contoso Agent Update Rollup
Download: Link
- Discovers all Agents and their Update Rollup version
- Monitors and alerts if agents don’t have the latest Update Rollup
- Task to install the Update Rollup. Only permissions required is Operator with permission to run the task.
Management Pack 2: (Optional) Contoso Agent Update Rollup FileDeploy
- Deploys out latest Update Rollup to Servers.
Download: Link
Getting Started
Management Pack 1 (Contoso Agent Update Rollup)
1.) Install Contoso Agent Update Rollup Management Pack
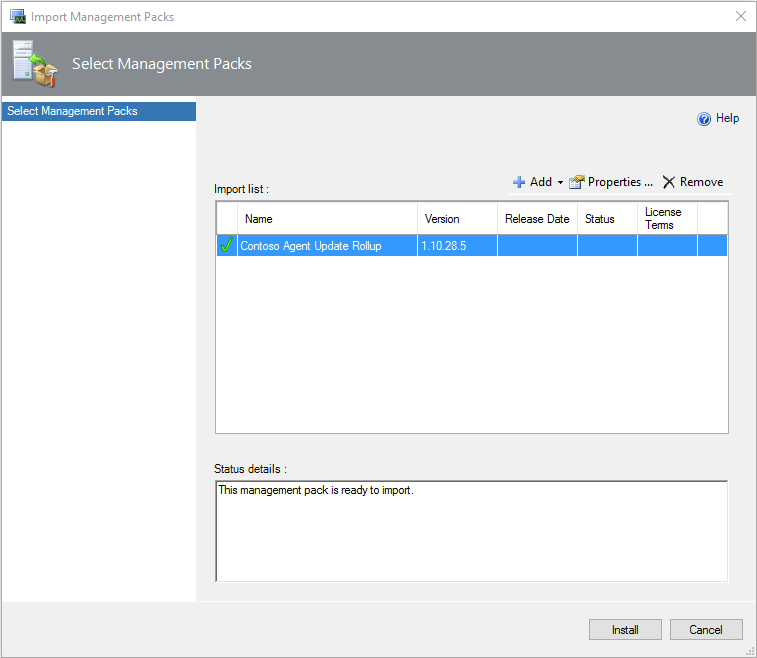
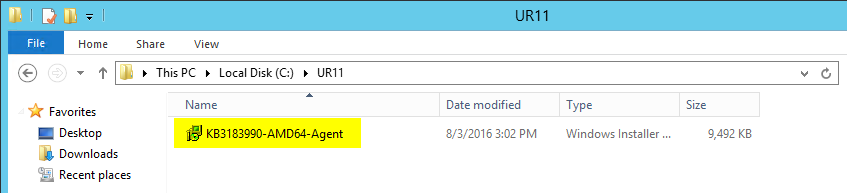
2.) Download UR11 from here, extract and copy the msp file to a folder on one of your management servers or on a file server that you can set permissions on.
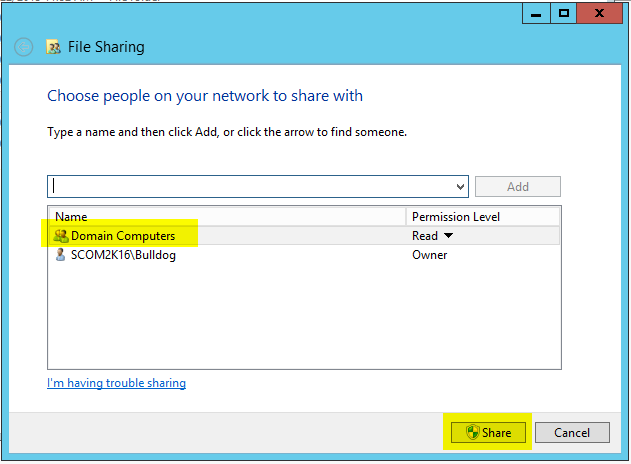
3.) Share out the file to all Domain Computers, or you can individually add each server you want to give access to the patch.

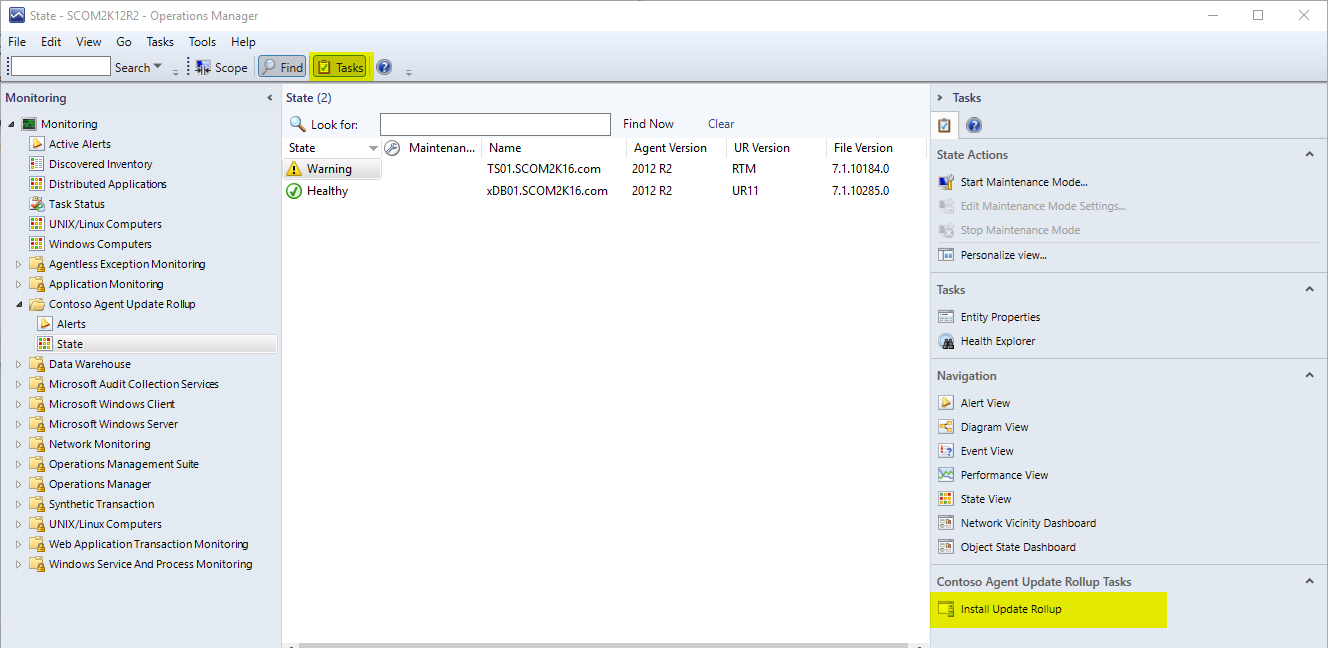
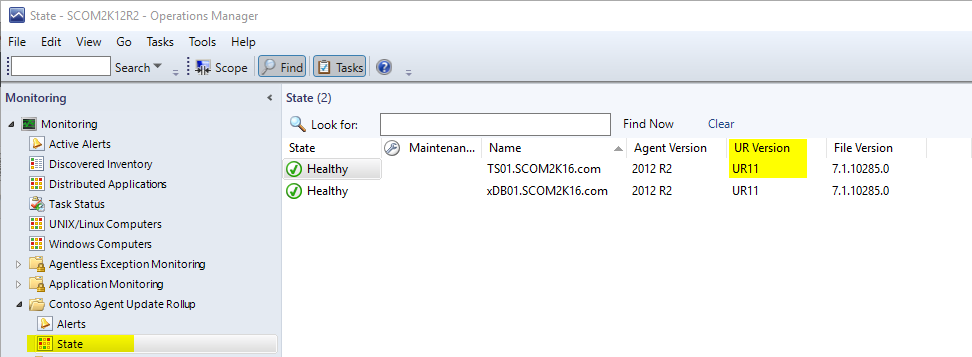
4.) Open up the SCOM console, a new folder called Contoso Update Rollup will now show up
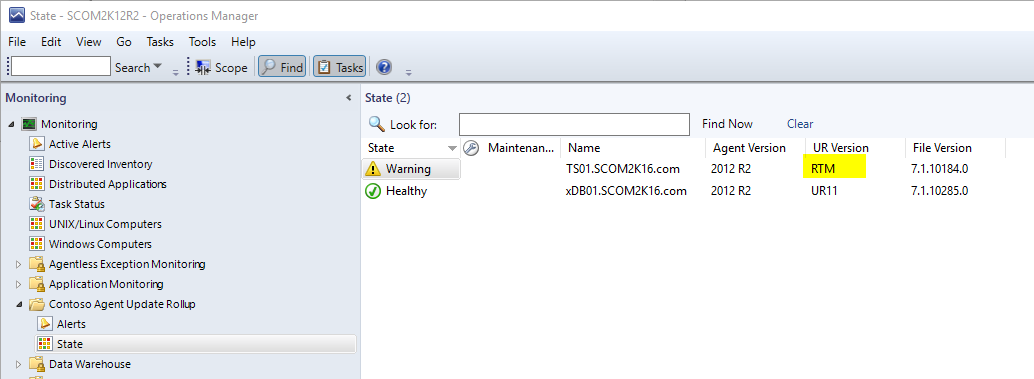
Expand that folder and click on the State View.
You can see I have two servers in my environment. One has UR11 installed and one that is still at RTM
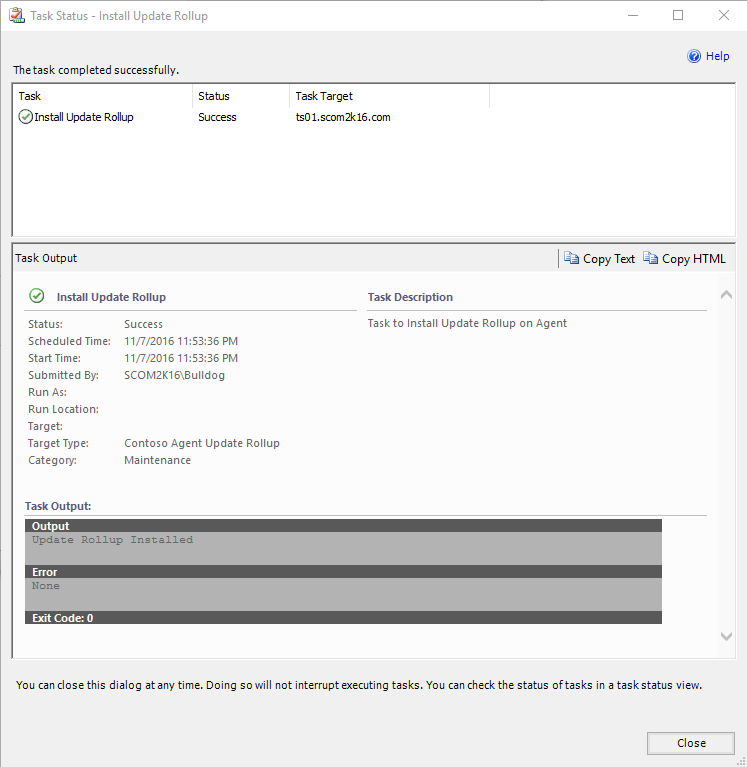
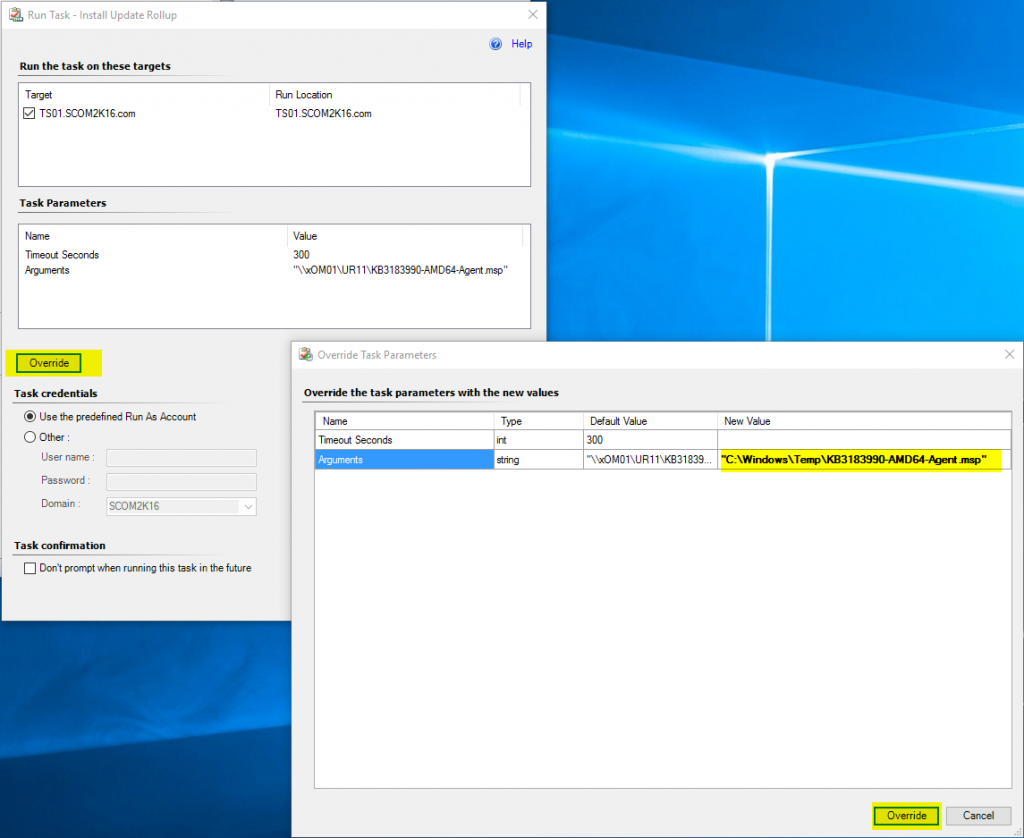
5.) To install the update on one or more servers I select the servers and click the Task called “Install Update Rollup”
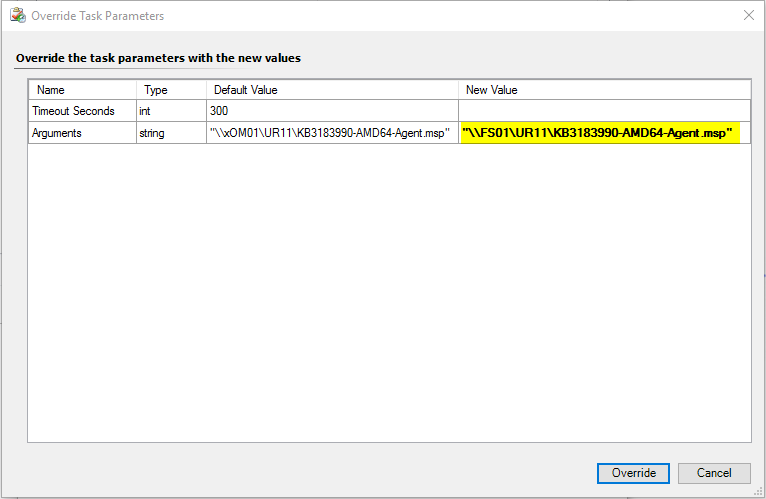
You can see the default is my file location. You need this to be the location of the file you shared out. Click override and enter the location of your update rollup patch file. Make sure you add double quotes around the location.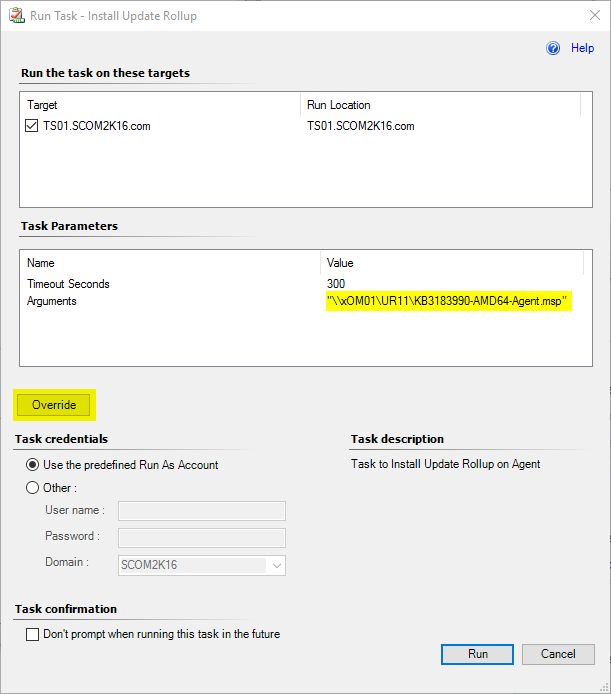
Side Note: If you don’t want to do this every time. You can modify the xml and re-import the mp. Just search and replace for the line (Make sure you include double quotes) <Arguments>”\\xOM01\UR11\KB3183990-AMD64-Agent.msp”</Arguments>

6.) Verify everything is correct and click run.
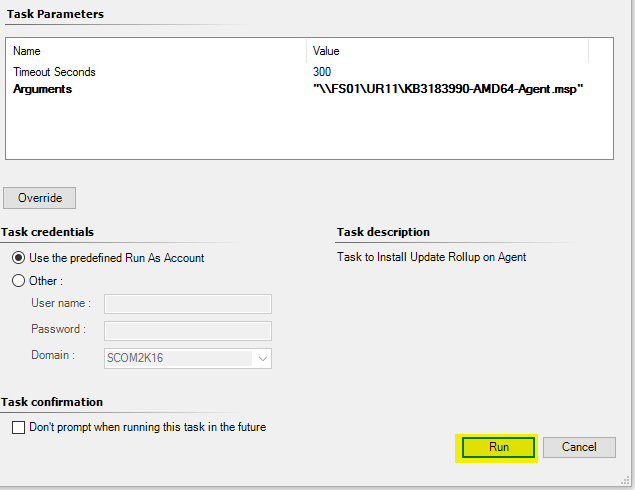
The task will run and output the results.
7.) After about 10 minutes. Go back and check the state view. The server should now show the updated UR Version and File Version
Management Pack 2 (Optional) Contoso Agent Update Rollup FileDeploy
For those who are not able to or don’t want to create a share for all domain computers for security reasons. I have another option. This management pack will embed the update rollup file in a management pack and deploy it to the servers. Then you can use the task in management pack 1 to update the agent with a file on the local system.
For legal reasons I have not included the management pack containing the update rollup, but I will include the project so you can quickly build your own.
How to build the Management Pack File
- Make sure you have Visual Studio 2013 or Visual Studio 2015 installed or have access to a computer that does.
- Also you will need the System Center Visual Studio Authoring Extensions installed https://www.microsoft.com/en-us/download/details.aspx?id=30169
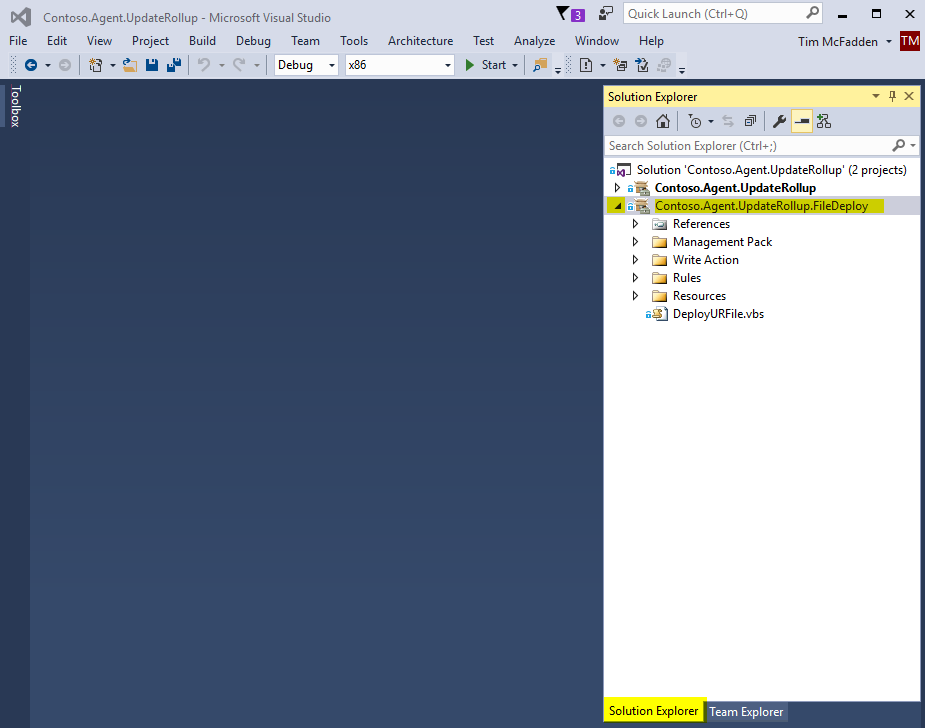
1.) Open the Solution by double clicking on the .sln file. This will open the file in visual studio.
2.) Select the Resources folder. Right click Add Existing Item.
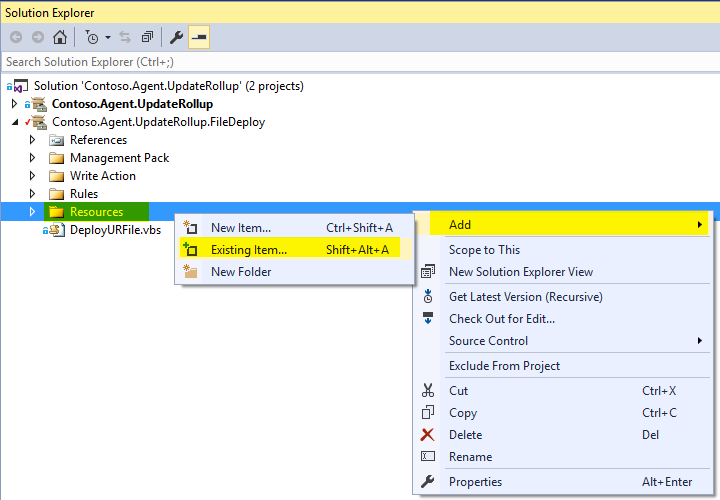
3.) Pick the drop down to show all files. Then browse to to where you have the Agent UR file located.
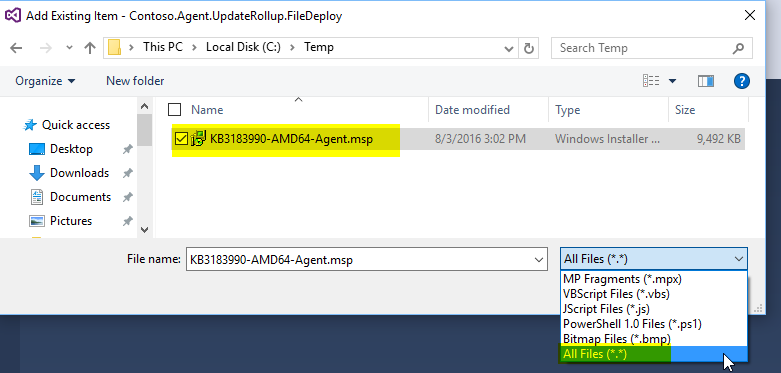
4.) Click on the file now and for Build Action choose Embedded Resource
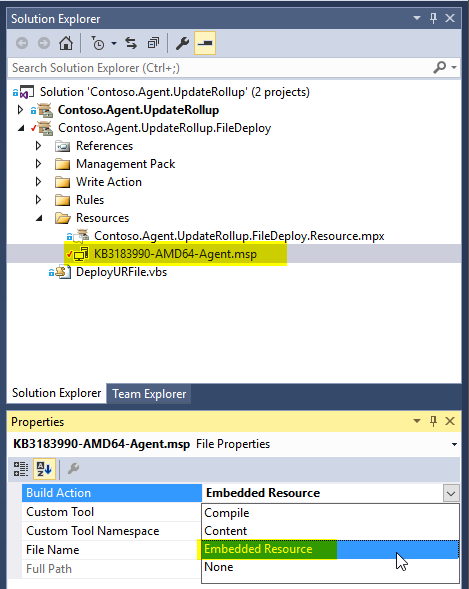
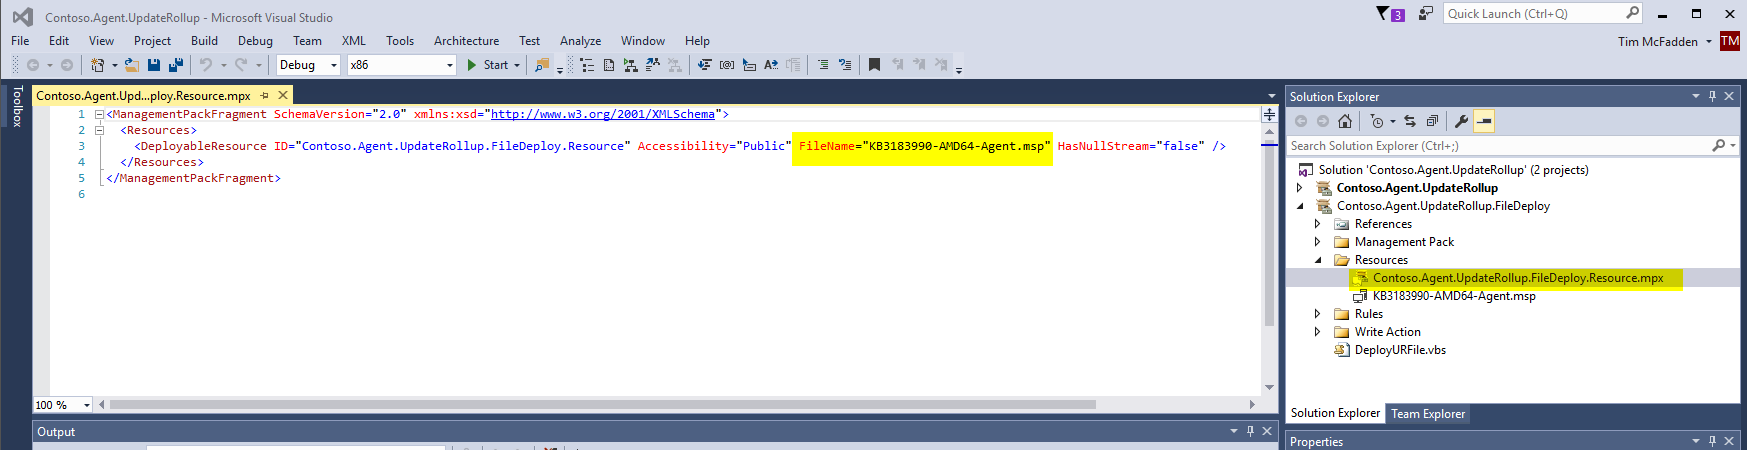
5.) Check that the Contoso.Agent.UpdateRollup.FileDeploy.Resource.mpx file has the correct file name. This may need to be changed if you are using a newer or older update rollup then UR11.
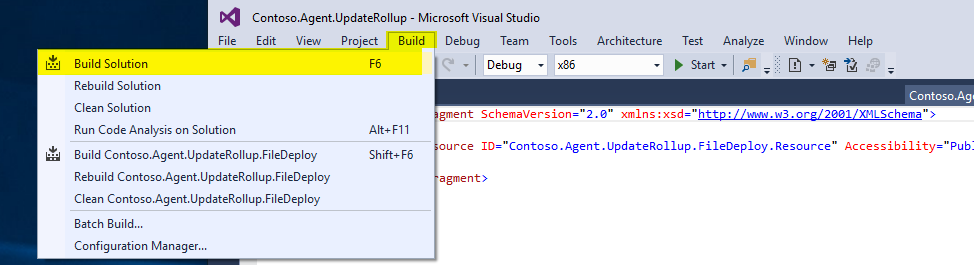
6.) Build the solution under Build, Build Solution
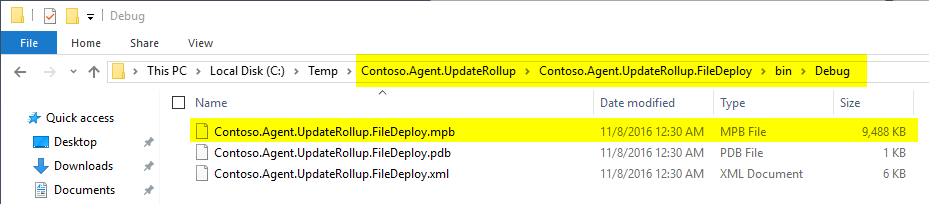
7.) Browse out to the build location. You should see a file called Contoso.Agent.UpdateRollup.FileDeploy.mpb
8.) Import the MPB Management Pack into SCOM.
After 10 minutes check your agents to see if the file was deployed.
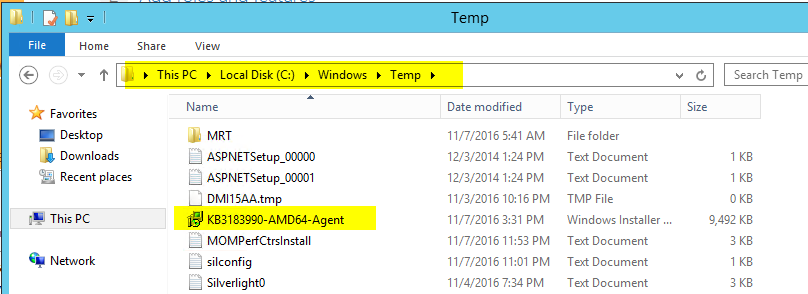
The default location is C:\Windows\Temp *Note this can be changed directly in the MP’s XML or with an override to the rule called “Contoso Agent UpdateRollup File Deploy”
Now you can run the task in Management Pack 1 with the local file location.
Thank you very much!!! I was on VSAE just thinking right now on doing something like this. That’s just great!
[…] writing my SCOM Agent Update MP I needed a way to get the SCOM Agent version from the file system. There is one file that gets […]
[…] Tim McFadden wrote a great MP for updating SCOM Agents […]
[…] Stop the madness of having outdated SCOM Agents in your environment […]